- Thread Author
- #1
ElunaMS
Server Rates: 6x EXP, 8x Meso, 2x Drop, 1.5x Legion Coins
Server Rates: 6x EXP, 8x Meso, 2x Drop, 1.5x Legion Coins
@check - Checks your actions and unstucks you if you are unable to teleport/talk to NPC's
@crashreport - Creates a crash dump file if your client crashes
@droptable - Check the drop table for monsters/bosses
@guide - opens a window that links to this guide
@help - Displays a list of all commands
@mapowner - Checks for the map owner
@Options - Opens up custom ingame options
@roll - Rolls a dice 1-100
@vote - Opens a window for voting
September Rune & Burning Increase
150% Runestone EXP
10 Minute Runestone Cooldowns
Level 15 Burning Fields (+150%)
Weekend Rate Event Sept 13 00:00 UTC - Sept 15 23:59
Intense Power Crystal - 1.5x Sale Price
Rebirth Flame - Increased Tier Up Chance
Star Force - 100% Success at 5/10/15
Weekend Rate Event Sept 20 00:00 UTC - Sept 22 23:59
Equipment Cube - 15% Discount
Arcane Symbol Daily Quest Reward - 2x Increase
Sacred Symbol Daily Quest Reward - 2x Increase
Weekend Rate Event Sept 27 00:00 UTC - Sept 29 23:59
Boss Sol Erda Energy - 3x Increase
Sol Erda Fragment - 2x Drop
To be announced
Added Kalos HP for Easy to Extreme
Added Section for Server Commands
Updated Minigame Shop Rewards
Updated DP Shop Rewards
Added Notes on 2x Sol Erda Booster
Added Notes on new PVAC Calculations
Added Note on Lynn's Sol Erda Storage in point 1.3
Grandis Fam/Meso have been added to point 1.4
Inner Ability Preset added to point 1.17
Added Section for Server Commands
Updated Minigame Shop Rewards
Updated DP Shop Rewards
Added Notes on 2x Sol Erda Booster
Added Notes on new PVAC Calculations
Added Note on Lynn's Sol Erda Storage in point 1.3
Grandis Fam/Meso have been added to point 1.4
Inner Ability Preset added to point 1.17
Challenge Kalos HP Fixed
March Events Added
How to obtain arcane symbols added to Hyper Burning Info in Point 2.14
March Events Added
How to obtain arcane symbols added to Hyper Burning Info in Point 2.14
Added Boss Guides for Black Mage/Seren/Kalos/Kaling in point 1.18 and 2.10
Welcome to a Joint Guide by Falrin and Paupa, if you have any suggestions on additions to make or comments; please contact us on discord.
Basic Rules and Terms of Conditions
Below are reasons that are the most frequent causes of bans in the server, please read this carefully to avoid having to submit a ban appeal.
Botting and Macroing
will get you banned (The server uses advanced machine-learning algorithms to detect if you are macroing or botting, resulting in almost guaranteed bans)
RWT (Real World Trading)
will get you banned as suspicious transactions are actively logged and investigated
Multi-accounting
which is the act of creating multiple accounts for any form of reason can result in automated bans if there are too many accounts associated with your HWID (Hardware ID). This will result in a chain ban for all affected PC's, meaning that sharing computers with friends or logging on for each other risks an automated ban.
Hacking
Third Party Software/Wiz Edits are not allowed. Being associated with a hacker (in a party) will also be considered hacking, and bannable. To note, this also means Virtual Machines are currently not greenlit for usage on Eluna
The usage of multiple PC's or using a Laptop is acceptable so long as no other accounts have logged into it. Do note that logging into too many different PC's or Laptops can cause issues (Typically 3+).
Announcement - Terms of Service
Terms of Service The regulations written and explicitly stated in this thread are applied to you (the user & account holder) upon creation of your account on any Eluna services. We reserve the right to prevent, delete and/or modify your accessibility from any particular one, and/or all of our...
Installation Guide
Download the full game client from the below link
 drive.google.com
If the file has been downloaded too many times, perform the following steps to bypass it.
MS247.3.zip
drive.google.com
If the file has been downloaded too many times, perform the following steps to bypass it.
- Sign into Google
- Go to drive.google.com
- Create a new folder
- Go back to download page for Eluna Top right, press the "add to google drive" button, it should be the left one
- Put the added file into the new folder you made
- Go back to google drive, right click your folder, select "download"
- Bottom right, it should say that it's compressing the file, then will eventually download
- Try updating your dotnet frameowork.
- If this does not work, try the next spoiler and uninstall interception.
- The server has Interception.dll blocked, try the following steps to uninstall it.
- Download https://github.com/oblitum/Interception/releases/ (Interception.zip) and extract somewhere.
- Open an administrator command prompt. (CMD as Admin)
- Do the following commands cd <path to where you extracted it> (E.X. > cd C:\Users<username>\Desktop\Interception\command line installer)
- Make sure you are in the "command line installer" folder in your command prompt.
- Type install-interception.exe /uninstall
- See this screenshot of how it should look like in your command prompt. https://imgur.com/a/witjmb5
- If you get an "Error deleting keyboard driver after the uninstall, restart your PC and see if you can login to the game now.
- If Eluna is not launching after clicking on the exe file, check your task manager to see if the data usage for Eluna is slowly increasing.
- If it is, you likely have the same issue as players from Singapore using the ISP: Singtel.
- Note that this issue is not limited to the Singtel ISP and can happen for different ISP's around the world.
- The current solution for this issue is to either login with your mobile data (if it uses a different telco/isp) or use a VPN.
Troubleshoot Thread
This thread will contain various errors and problems related to MapleStory private servers. While some of these may not be encountered while playing Eluna, they are being documented here for any future instances. Current Version: 256.5 Eluna Links: Eluna Website Eluna Discord The installation...
ElunaMS Features and Basic Info
Eluna World Channel Regions
North America: 1-10
Europe: 11-20
South East Asia: 21-30
Oceania: 31-40
- Gollux and Commerci have been disabled for healthier equipment progression.
- Purchases from the Absolab and Arcane Equipment Stores are untradable.
- Tower of OZ has been disabled and will re-introduced with revamped rewards in the future.
- Skill Changes
- Erda Fountain

- This skill has been modified to allow better farming utility for all classes
- This skill has been modified so it can be toggled between two modes with @Options
- Right click on Erda Shower/Fountain in the V Matrix to have its default cast be Erda Fountain
- Mode 1
- No changes
- Mode 2
- Max Summon Count: 1 - 2
- Summon Duration: 60s - 90s
- Summon Cooltime: 60s - 5s
- Mode 1
- Beast Tamers are able to max all Animals
- Implemented Lynn's Sol Erda Storage
- Existing Beast Tamer's can now open the HEXA Matrix by navigating to the quest [6th Job] HEXA Matrix.
- When clicking on the ? for the help menu, you will see a new option for Lynn's Sol Erda Storage.
- You may deposit an infinite amount of energy so that you may use it when Lynn is released.
- You may withdraw any amount of energy you have in the storage up to the maximum allowed at a time (20).
- Storage Slots will have the maximum slots unlocked.
- Legion coin generation has been increased by 1.5x
- Legion Preset 3, 4, and 5 are permanently unlocked.
- Familiar Preset 3, 4, and 5 are permanently unlocked.
- Guild Skills are not removed upon disconnecting (Their cooldown does not decrease when logged off).
- Increased maximum V Matrix nodes from 300 to 600.
- The 5th job questline now offers a skip option at the first quest.
- All Boss Pre-requisites have been removed
- Arcane River questline can be skipped
- Grandis Questlines are automatically skipped
- Cumulative Boss Points
- Boss Points will be rewarded in the total sum of all modes that share a cooldown from the difficulty you cleared and below
- Example: If you clear Hard Lotus, you will receive the sum of both Hard and Normal Lotus.
- Boss Points will be rewarded in the total sum of all modes that share a cooldown from the difficulty you cleared and below
- Boss entry limits have been removed
- Practice Mode Buff Preset Manager
- You may view the preset manager to choose which skills or items you wish to have applied at each Boss Entrance or the Dojo Training Grounds.
- When entering a Practice Mode Boss or Dojo Training Grounds, you will receive all of the buffs that are enabled in your preset manager. At the time of leaving, any buffs that were applied due to your preset manager will be removed.
- If you already own the skill or item you have enabled in the preset manager and use that item or skill while in practice mode, your buff will not be removed when you leave.
- Arcane River and Grandis Quests can now be accepted in Batches for player convenience.
- Arcane River
- Arcane Symbols
- Each Arcane River region questline rewards you with a Lv. 5 Arcane Symbol instead of Lv. 1.
- Each Arcane River daily will reward you with 50 symbols instead of 20.
- Each Arcane River Weekly will reward you with 135 symbols.
- Arcane Symbols
- Grandis
- Sacred Symbols
- Cernium Dailies Reward you with 30 symbols.
- Other Grandis Continent dailes will reward you with 20 symbols.
- Grandis Continent Meso Multiplier
- The multiplier for meso in Grandis Continent has been increased with the following multipliers:
- Cernium & Burning Cernium: 20%
- Hotel Arcus: 25%
- Odium: 30%
- Shangri-La: 35%
- Arteria: 40%
- Carcion: 45%
- The multiplier for meso in Grandis Continent has been increased with the following multipliers:
- Grandis Familiar Points
- Monsters in Grandis drop familiar cards, similar to GMS.
- Sacred Symbols

- Zero to One Hundred is a custom feature that can be done on an unlimited number of characters per day.
- Players ranging from level 1 to 101 may participate in this content with increased experience, taking roughly 2 to 3 minutes to reach level 101.

AS OF 10/2/2024 - ALL EXP MULTIPLIERS (IE: Exp Coupons DO NOT WORK FOR TISK STOREHOUSE) - Only Skills such Mercedes Link/Evan Link/Zero Legion/Legion Board Works
- Accelerated Leveling for Mains/Mules/Legion Characters
- You can find the Storehouse at the top right of the Eluna home map.
- Players can participate in this content from levels 101 - 260.
- Players can enter the Storehouse on 3 characters per day.
- You may enter the Storehouse and kill up to 1000 mobs per day on each character to gain an increased amount of exp.
- You may exit at any time and return on the characters that left to continue their remaining killcount.
- Experience Boosts will from various Boost Sources will apply to the EXP gained from the monsters within.
 Holy Symbol (21.5-50% EXP)/Decent Holy Symbol (20-35% EXP)
 Liberated Rune power obtained by solving any rune on a map with monsters once every 15 Minutes for 100% Exp(10 During events for 150% Exp)
 The Evan Link skill Rune Persistence allows for the duration of bonus EXP from runes to last an additional 30/50/70%
 1 Day 2x Exp Special Coupon (From Vote Points) - Despite the tooltip of the Item stating that the effect on characters up to level 250, it works till level 300
 Legion's Expertise (100%) or 2x Exp Coupon (From Vote Points)
 50% Exp Boosts from either 50% Bonus Exp Coupon or MVP Atmoshperic Effects
 Extreme Gold Potion - Obtainable from Monster Park (10%)
 Elven Blessing - Merceds Link Skill gives a persistent 10/15/20% Exp Boost
- Zero Legion Block gives 4/6/8/10/12% Exp at lvl 130/160/180/200/250
- For characters at level 200 that have completed the 5th job advancement, it is suggested to use Erda Fountain and place one at both corners. This will allow you to complete your 1000 kills in roughly 5 minutes.

Backtrack and check all the maps, you missed a monster
Backtrack and check all the maps, you missed a monster
- Enter the dungeon to kill a variety of monsters and a final boss to receive free meso and items each day.
- You can find the Reward Dungeon at the top right of the Eluna home map.
- The Reward Dungeon can be cleared 3 times per day per world.
- You can enter the Reward Dungeon either by yourself or with a partner (Entering with a partner scales the mob HP by 1.4x).
- There are 5 different difficulties you can participate in (Monsters within have PDR, so wear equipment with IED!).
- Easy (Min Lv. 200)
- Normal (Min Lv. 220)
- Hard (Min Lv. 240)
- Chaos (Min Lv. 260)
- Extreme (Min Lv. 280)
- When clearing the Reward Dungeon players will receive a fixed amount of mesos per clear.
- 25,000,000 Mesos (Easy Difficulty)
- 50,000,000 Mesos (Normal Difficulty)
- 75,000,000 Mesos (Hard Difficulty)
- 100,000,000 Mesos (Chaos Difficulty)
- 150,000,000 Mesos (Extreme Difficulty)
- After clearing the boss, you may click the
Leave Dungeon button to claim your reward and leave. This button is where Cash Shop usually is.
- The following is a list of rewards you can earn at chance based on the difficulty you cleared. At the end of the dungeon, you will be given an option to choose between 2 randomly selected items (Duplicate items will not be given each run)
-

-

-

-

-

-


- Boss Points are acquired from killing bosses ingame. You can access quick teleports by clicking the
 button in your keybinds, then selecting boss content.
 - Cumulative Boss Points
- Boss Points will be rewarded in the total sum of all modes that share a cooldown from the difficulty you cleared and below
- Example: If you clear Hard Lotus, you will receive the sum of both Hard and Normal Lotus.
- For bosses that have weekly and daily cooldowns (IE: CRA), you will have to do both to get the boss points.
- Boss Points will be rewarded in the total sum of all modes that share a cooldown from the difficulty you cleared and below
- The Shop is restocked on a weekly basis on Thursday 00:00 UTC


- Type @vote ingame
- Select Vote for Eluna

- Solve the Captcha and Submit
- Claim your vote points at the Special Chest Ingame (Far right of the Map in the hometown Eluna)
- Vote points are doubled during the first 5 days of each month (From 4 to 8)

- Take note that the Pet Vac is only purchasable 3 times per weekly reset cycle


- Did you speak to the special chest to claim your vote points key?
- Try using your mobile data with your phone to vote via the Eluna.ms website

Temporary Guide while waiting for the official guide from shade


- Speak with Mansa and Select Donate, the only available option is Crypto due to an issue with Stripe in the past
- I suggest selecting only Litecoin (LTC) or USD Coin (USDC) as their fees are minimal compared to other coins - For reference, the LTC fee is roughly $0.1 per transaction while Bitcoin is roughly $28 per transaction
- Open your crypto wallet and scan the QR code, or copy the LTC/USDC address to make payment
- Speak to Mansa again and select Claim Donation Keys to receive your Donation Points (This might take several minutes for the key to be received)
- Take note that the Fire Starter Ring has a 30 Minute Cooldown, while maps has a cooldown of 1 hour from it.
- Android Heart Requires 1K For the Purchase of a Lidium Heart
- The upgrade to the Superior Lidium Heart Costs 1.5K
- The upgrade to the Titanium Heart Costs 2.5K
- The upgrade to the Outlaw Heart Costs 3.5K
- Cash Equips such as the Grin Ring, Hellia Necklace, Doom Shoulder and Avenger Quiver Belt are permanent and can be transferred via the cash shop to your other character
- Take note that the 2x Sol Erda Booster works based on the REMAINING duration of your current Sol Erda Booster till its expiry date. If you purchase the 2x booster when your Sol Erda Booster is 1 day from Expiry, it will expire in 1 day.
- These are the current Surprise Style Box Rotation Cycles
- Rotation 1: 1st ~ 7th
- Rotation 2: 8th ~ 15th
- Rotation 3: 16th ~ 23rd
- Rotation 4: 24th ~ 31st


- The event shop has events that occur every odd hour IE: 07:00, 09:00
- You can enter the events by clicking on the invitation that appears above your character at the designated hour.

- The events typically taken 10 minutes to complete, though you are able to go afk and still receive your rewards.
- The Shop is restocked on a weekly basis on Thursday 00:00 UTC


- Select the Quick Move button

- Select Dimensional Mirror

- Scroll down and Select Event Hall


- Jump quests give 250 points upon completion
- Blink Race utilizes the 5th job Blink Skill and requires two players participating. Both players use the blink skill once the inital preparation timer is over and the first player to blink into the "Goal" wins. The winner will receive 50 Points.
- Night Tag can be played with up to 6 players and is a simple game of hide and seek. The tagger has their screen mostly blacked out and will have to catch players. The tagger receives 10 points for each player tagged, while players that are tagged receive 50 points.
- Roll Roulette involves at least two players using the @roll command ingame.
- Minigame shop items are restocked monthly.


- Select the Quick Move button
- Select Dimensional Mirror
- Select Party Quest Entrance


- This is the party quest that you will typically see players recruiting for.
- There is a minimum entry requirement of 3 players.
- You will normally receive roughly 1000~1200 points each run.
- Any class with dark sight is able to significantly reduce the difficulty of the jump quest by using dark sight prior to entry into the jump quest/jumping stages.


- The Cube Manager allows you to speed up the cubing process for items compared to purchasing and using cubes manually from the Eluna Vendor
- Speak to Knox to select the item you wish to cube

- Select the relevant Cube for the potential you are interested in

- The Rough Tier Up Rates for the Cubes are as follows (Our rates are slightly higher than the below rates)
- Red Cube (Rare to Epic 10%), (Epic to Unique 5%), (Unique to Legendary 2.5%)
- Black Cube (Rare to Epic 20%), (Epic to Unique 10%), (Unique to Legendary 5%)
- The additional benefit of black cubes is that you are able to choose if you want the old or new potential as well as increased tier up rates from black cubes. Additionally, Black Cubes have a higher chance of rolling additional Legendary Potential Lines.
- Bonus Potential Cube (Rare to Epic 10%), (Epic to Unique 5%), (Unique to Legendary 2.5%)
- White Cube (Rare to Epic 10%), (Epic to Unique 5%), (Unique to Legendary 2.5%)
- The additional benefit of White cubes is that you are able to choose if you want the old or new potential. Unlike black cubes, it does not provide any other benefits.
- If you are specifically going for a set of potential and no alternatives (IE: 30% Attack on a weapon), you can consider selecting autocube if you have sufficient funds to do so as you will likely have to go through thousands of cubes for your desired potential.

- Select Attack if you are going for Attack% like in the example

- Input the desired attack value based on your objective
- Hold down your Interact/Harvest Key (Do not bind it to Y), a prompt will be given when the chosen potential is reached


- The Eluna Merchant has some necessities that every player should purchase or will eventually purchase.
- Power Elixers, Buff Freezers, Safety Charms are cheap and should be purchased on every character.
- Miracle circulators are available for 12,000,000 Mesos and should be used to assist you in rolling for an Ideal second Inner ability line when your inner ability is at Legendary.
- Silver Potential Stamps allow you to reach 3 Lines of Main Item Potential.
- Golden Hammer Coupons allow you to have additional scrolling slots (a maximum of 2 per item).
- Safety Scrolls allow you to not lose a scrolling slot when a scroll fails.
- Protection scrolls allow you to prevent an item from being destroyed while scrolling. (This is mainly for the dominator pendant and must be used before the item is 17 stars)
- An MVP rank is given based on your level of spending.
- Bronze ranks are given based on lifetime spending reaching the required amount.
- Silver and above ranks are given based on spending in the current month + all spendings made starting from the 1st day of the month that is 2 months before the current month.
- Example: You donate $500. You’ll get Mvp diamond instantly, and after 3 months you degrade down to bronze IV
- You will never degrade below bronze.
- Spending amount is added up across all worlds, and the MVP rank is shared across all worlds.
- MVP in Eluna requires half the amount that is required in GMS for the respective tier.
- $1 Spent = 2k "NX"
- Bronze
- Bronze I - 10k ($5)
- Bronze II - 100k ($50)
- Bronze III - 200k ($100)
- Bronze IV - 300k ($150)
- Silver - 300k ($150)
- Gold - 600k ($300)
- Diamond - 900k ($450)
- Red - 1.5m ($750)
- Gift packs can be received during each period once.
- 1st Period: 1st day ~ 10th day of the month
- 2nd Period: 11th day ~ 20th day of the month
- 3rd Period: 21st day ~ last day of month
- Each rank receives a different quantity of each item.
- Bronze I to Bronze IV receives the same quantity.
- If your MVP grade increases, the gift pack can be received again to receive the difference between the quantities for the new grade and the quantities that you have already claimed for that gift pack.
- However, it cannot backpay earlier gift packs if the rank increases only after the 1st period.
- These rewards are claimable via the cash shop every cycle.


- Tips and Tricks for Min-Maxing
- Roll for the second line with miracle circulators from the Eluna Shop as circulators give the maximum possible value for all lines.
- Create three different presets for different purposes, IE:
- Preset 1 (Bossing Preset): Boss Damage 20% (Legendary), Crit rate 20% (Unique), Abnormal Monster Damage 8% (Unique)
- Preset 2 (Mobbing Preset): Meso Drop 20% (Legendary), Crit Rate 20% (Unique), Item Drop Rate 15% (Unique)
- Preset 3 (Boss Loot Room Preset): Drop Rate 20% (Legendary)
- The liberation process in Eluna can be completed in as a little as 3 months as compared to the 8 months in GMS.
- Black mage's cooldown resets on the 1st and 15th of each month, allowing for two kills a month.
- Challenge Mode Black Mage and Seren allows for you to claim an extra remnant upon your FIRST successful clear (5% Damage Required)
- Challenge Mode rewards are retroactive. Meaning that killing Challenge Mode Seren/Black Mage before your first black mage clear will still record your additional rewards for future claims.
Black Mage Guide - By Cruel, Bane & Pinkberry
Note: All damage values are exclusive of Black Curse's +15%HP damage
 docs.google.com
- Select the quest [Genesis Weapon] Trailing the traces of the Black Mage via the white light bulb and click Mission Progress Status


- Begin the liberation process by accepting the following quest from the white light bulb.
- Do not kill black mage before picking up this quest
ElunaMS Progression Guide
- This progression guide will explain basic maplestory concepts such as the Legion, Link Skills and Gear Upgrade Priorities.
- Due to similarities between GMS and Eluna, some existing guides for GMS will be utilized.
- We will also cover adjustments to progression due to custom changes in Eluna.
- Link skills generally follow the same principles as GMs, however there are some exceptions.
- There is no cooldown between swapping link skills for different characters.
- The benefits from the Aran Link skill for combo exp orbs is negligible.

MapleStory Link Skills Guide - DigitalTQ
MapleStory Link Skills are a way for you to benefit from leveling multiple characters and gaining extra stats on your main character
 www.digitaltq.com
- Take note that you should alter these builds to fit your class based on your preference or stats.

- Take note that you should alter these builds to fit your class based on your preference or stats.

- Legion coins are acquired at 1.5x the GMS Rate
- Legion coins can also be acquired from the Daily Reward Dungeon
- Use the Linked Legion Solver for an optimal way of filling up your Legion Grid
MapleStory Legion Guide - DigitalTQ
MapleStory Legion is a character progression system that gives you stat bonuses and benefits for leveling up all the different types of classes of MapleStory
www.digitaltq.com
- Use the Guide button in your keybinds
 to access the maple guide and select Level Content.

- Level rewards are available at Level 30, 60, 80, 100, 120, 140, 160, 180 and 200.
- Please take note that these Level up rewards can only be claimed ONCE PER ACCOUNT (Please only take them on your main character).
- Select the above button at the left of your screen upon reaching level 100 & 150
- Lv. 100 Beginner Treasure Chest(Time Restricted: 30 Days)
- Open this chest to receive the following item(s):
- Saint Exorcist Medal (60% Meso Obtained Potential)
- Open this chest to receive the following item(s):
- Lv. 150: Root Abyss Set Box (Time-Restricted):Untradeable. Can be opened at Lv. 150. Open to receive:
- Root Abyss Hat: Untradeable, 90-day duration. 15-Star Enhanced, 3 Epic Potential lines. Transfer Hammer and Scissors cannot be applied.
- Root Abyss Top: Untradeable, 90-day duration. 15-Star Enhanced, 3 Epic Potential lines. Transfer Hammer and Scissors cannot be applied.
- Root Abyss Bottom: Untradeable, 90-day duration. 15-Star Enhanced, 3 Epic Potential lines. Transfer Hammer and Scissors cannot be applied.
- Fafnir Weapon Box (Time-Restricted):Untradeable.
- Weapon Details: Untradeable, 90-day duration. 15-Star Enhanced, 3 Epic Potential lines. Has an Epic Potential, granting Weapon ATT/Magic ATT +6%, Critical Rate +4%, and Damage +3%. Transfer Hammer and Scissors cannot be applied.
- Hyper Burning Cycle
- Hyper Burning will result in 1+2 levels each time you level up until you reach Lv. 260.
- You are unable use level up potions on a hyper burning character.
- You may hyper burn an existing character below Lv. 258 or a new character.
- You can claim rewards at level 11 and then again at level 200 and every 5 levels after until you reach Lv. 260.
- If you burn an existing character, that character will not receive any rewards below their existing level.
- Exception: Lv. 11 - 199 rewards are available at all times
- If you burn an existing character, that character will not receive any rewards below their existing level.
- You may only have one Hyper Burning character on your account at a time.
- You can now delete your existing Hyper Burning character and still claim all rewards on a new one as the rewards are untradeable.
- Lv. 1: Mysterious Cryptic Chest: Untradeable. Open to receive:
- Snail Pet: 30-day duration.
- Lv. 30: Lv. 30 Equipment Box: Untradeable. Can be opened at Lv. 30. Open to receive a weapon and armor set suitable for your class.
- Lv. 100: Legendary Cryptic Chest:Untradeable. Can be opened at Lv. 100. Open to receive:
- Frozen Hat: Untradeable. Req. Lv: 100. STR/DEX/INT/LUK +23, MaxHP/MaxMP +270, Weapon ATT/Magic ATT +1, Defense +293. Upgrades available: 10.
- Frozen Cape: Untradeable. Req. Lv: 100. STR/DEX/INT/LUK +7, Weapon ATT/Magic ATT +7, Defense +180, Speed +9, Jump +5. Upgrades available: 7.
- Frozen Suit: Untradeable. Req. Lv: 100. STR/DEX/INT/LUK +27, Weapon ATT/Magic ATT +1, Defense +315. Upgrades available: 10.
- Frozen Weapon Box: Untradeable, 7-day duration. Open to receive:
- Frozen Weapon: Untradeable. Req. Lv: 100. Stats will vary based upon your job.
- Frozen Secondary Weapon Box: Untradeable, 7-day duration. Open to receive:
- Frozen Secondary Weapon: Untradeable. Req. Lv: 100. Stats will vary based upon your job.
- 5x 2x Exp Coupon (1 Hour)
- Lv. 200: Eternal Flame Title Coupon: Title. Stat duration lasts for 60 days. Can be used at Lv. 200 after completing your 5th Job Advancement and the "A Greater Power, Arcane Power" quest. Grants durational stats STR/DEX/INT/LUK +15, Weapon ATT/Magic ATT +15, Boss Damage +10%, Ignore Defense +10%, MaxHP/MaxMP +750, 10% Bonus EXP, Arcane Power +50.
- To claim your hyper burning symbols, you must first complete the relevant arcane symbols quest (The questline is skipped, so just speak to the NPCS below)
- For Vanishing Journey (Level 200 Required) - Complete the quest a greater power and the questline in your white light bulb, it should reward you with a false "Arcane Symbol", then teleport to Lake of Oblivion: Nameless Town and talk to Kao to receive Arcane Symbol: Vanishing Journey
- For Chu Chu Island (Level 210 Required) - Teleport to Chu Chu Island: Muto's Descent and talk to Muto
- For Lachlein (Level 220 Required) - Teleport to Chu Chu Island: Muto's Descent and talk to Muto
- For Arcana (Level 225 Required) - Teleport to Lachlein: Lachlein Canal and talk to Flying Fish
- For Morass (Level 230 Required) - Teleport to Arcana: Cavernous Cavern and talk to flying Fish
- For Esfera (Level 235 Required) - Teleport to Morass and talk to Jean
- Lv. 200:Reach Lv. 200 on your Hyper Burning character to receive the following rewards:
- Nodestone (x50): Untradeable, 7-day duration.
- Lv. 7 Arcane Symbol: Vanishing Journey: Untradeable, Permanent.
- Lv. 210:Reach Lv. 210 on your Hyper Burning character to receive the following rewards:
- Eternal Flame Ring Coupon: Untradeable, 7-day duration. Contains a permanent Eternal Flame Ring, which grants STR/DEX/INT/LUK +40, MaxHP/MaxMP +4,000, and Weapon ATT/Magic ATT +25.
- Lv. 7 Arcane Symbol: Chu Chu Island: Untradeable, Permanent.
- Lv. 215:Reach Lv. 215 on your Hyper Burning character to receive the following rewards:
- Nodestone (x50): Untradeable.
- Lv. 220:Reach Lv. 220 on your Hyper Burning character to receive the following rewards:
- Lv. 7 Arcane Symbol: Lachelein: Untradeable, Permanent.
- Select oneof the following rewards:
- AbsoLab Weapon Box: Untradeable. Contains a permanent 17-star Unique Astrolab Weapon for your character's job. The potential cannot be reset and the starforce cannot be further enhanced.
- Dominator Pendant Box: Untradeable. Contains a permanent 15-star Unique Dominator Pendant. The potential cannot be reset and the starforce cannot be further enhanced.
- Lv. 225:Reach Lv. 225 on your Hyper Burning character to receive the following rewards:
- Nodestone (x50): Untradeable.
- Lv. 7 Arcane Symbol: Arcana: Untradeable, Permanent.
- Lv. 230:Reach Lv. 230 on your Hyper Burning character to receive the following rewards:
- Nodestone (x50): Untradeable.
- Lv. 7 Arcane Symbol: Morass: Untradeable, Permanent.
- Hyper Burning Outfit Set Coupon: Untradeable, coupon lasts 7 days until consumed. Contains:
- Hyper Burning Hat: Hat Outfit, untradeable, permanent. Grants the following stats for 30 days: STR/DEX/INT/LUK +10, MaxHP/MaxMP +500.
- Hyper Burning Robe: Overall Outfit, untradeable, permanent. Grants the following stats for 30 days: STR/DEX/INT/LUK +10, MaxHP/MaxMP +500.
- Hyper Burning Weapon: Weapon Outfit, untradeable, permanent. Grants the following stats for 30 days: Weapon ATT/Magic ATT +10.
- Lv. 235:Reach Lv. 235 on your Hyper Burning character to receive the following rewards:
- Experience Nodestone (x2): Untradeable.
- Lv. 7 Arcane Symbol: Esfera: Untradeable, Permanent.
- Lv. 240:Reach Lv. 240 on your Hyper Burning character to receive the following rewards:
- Experience Nodestone (x2): Untradeable.
- Nodestone (x50): Untradeable.
- Arcane Symbol Selector Coupon (x100): Untradeable
- Lv. 245:Reach Lv. 245 on your Hyper Burning character to receive the following rewards:
- Experience Nodestone (x2): Untradeable.
- Red Cube (x30): Untradeable.
- Arcane Symbol Selector Coupon (x100): Untradeable
- Lv. 250:Reach Lv. 250 on your Hyper Burning character to receive the following rewards:
- Infinite Flame Title Coupon: Title. Untradeable, Stat duration lasts for 90 days. Grants durational stats STR/DEX/INT/LUK +30, Weapon ATT/Magic ATT +30, Boss Damage +20%, Ignore Defense +20%, MaxHP/MaxMP +1500, 20% Bonus EXP, Arcane Power +50, Sacred Power + 50.
- Experience Nodestone (x2): Untradeable.
- Arcane Symbol Selector Coupon (x100): Untradeable
- Lv. 255:Reach Lv. 255 on your Hyper Burning character to receive the following rewards:
- Experience Nodestone (x2): Untradeable.
- Arcane Symbol Selector Coupon (x100): Untradeable
- Lv. 260:Reach Lv. 260 on your Hyper Burning character to receive the following rewards:
- HYPER BURNING Medal (x2): Untradeable. Grants durational stats STR/DEX/INT/LUK +6, Weapon ATT/Magic ATT +6
- Sacred Symbol Selector Coupon (x100): Untadeable.
- Sol Erda and Sol Erda Fragments
- Adele: https://discord.gg/AdeleMaplestory
- Angelic Buster: https://discord.gg/3C9J2CYYsf
- Aran: https://discord.gg/tdKzgaP4ks
- Ark: https://discord.gg/ZvPTz6v
- Battle Mage: https://discord.gg/HsTgS8svrf
- Beast Tamer: https://discord.gg/czcga75tHQ
- Beginners (Jobless) https://discord.gg/mQakqs86M3
- Bishop: https://discord.gg/PX2v4BV3Qp
- Blaster: https://discord.gg/QXvbNp8zqu
- Blaze Wizard: https://discord.gg/gTuaWGrcvV
- Bowmaster: https://discord.gg/YJqyRYxWV3
- Buccaneer: https://discord.gg/EPxuyRy
- Cadena: https://discord.gg/5rKRYYCA4v
- Cannoneer: https://discord.gg/QxWvMvrcR6
- Corsair: https://discord.gg/JWBXPGS9aY
- Dark Knight: https://discord.gg/N36cqyAVfa
- Dawn Warrior: https://discord.gg/WMGahCmmWT
- Demon Avenger: https://discord.gg/aTByagnDjd
- Demon Slayer: https://discord.gg/XpJA3u8Scd
- Dual Blade: https://discord.gg/2yqrcnT8Xk
- Evan: https://discord.gg/5BfVGGD
- Explorer Mages: https://discord.gg/PX2v4BV3Qp
- Fire/Poison Mage: https://discord.gg/PX2v4BV3Qp
- Hayato: https://discord.gg/EAkfmrx
- Hero: https://discord.gg/dsdSz9CGJE
- HoYoung - Elitists that require GMS verification.
- Ice/Lightning Mage: https://discord.gg/PX2v4BV3Qp
- Illium: https://discord.gg/KxJ3DGuBsf
- Kain: https://discord.gg/Udtx9E9QYr
- Kaiser: https://discord.com/invite/DGHZJ8s
- Kanna: https://discord.gg/zbH8e2xC7H
- Khali: https://discord.gg/aDZvtHjcuR
- Kinesis: https://discord.gg/yua4VdQWFw
- Lara: https://discord.gg/g33kJR5yWH
- Luminous: https://discord.gg/KBpPTtae6P
- Marksman: https://discord.gg/BYvnXkz9cv
- Mercedes: https://discord.gg/tJWfMrdFBJ
- Mechanic: https://discord.gg/JenpnsgHBc
- Mihile: https://discord.gg/6SPVvZRWJM
- Night Walker: https://discord.gg/FR55ADj
- NightLord: https://discord.gg/AvP8wq4
- Paladin: https://discord.gg/7qyGfmtRt2
- Pathfinder: https://discord.gg/xzFRyMXBmR
- Phantom: https://discord.gg/225H7sw
- Shade: https://discord.gg/G86EwxDbv6
- Shadower: https://discord.gg/Nud7KbBFd9
- Thunder Breaker: http://discord.gg/ewyWwFQ
- Wild Hunter: https://discord.gg/3evaYBDwAG
- Wind Archer: http://discord.gg/MDuDrDveum
- Xenon: https://discord.gg/4BCGuCC
- Zero: https://discord.gg/wFAHprps3Z
- Inner abilities are identical to GMS with the exception that due to inner ability presets only being scheduled for release in KMS in May 2024, most players use Meso 20% as their first line (Unless they require 1 Attack speed for their class)
- Miracle Circulators are not available from the cash shop and are instead purchase with 16,000,000 Mesos at the Eluna Merchant.
- Chaos and Black Circulators will be added in a coming Maintenance.

MapleStory Inner Ability Guide - DigitalTQ
MapleStory Inner Ability is a system that allows your characters to gain extra stats much like the Potential System.
www.digitaltq.com

Best Inner Ability For Every Class - MapleStory - The Digital Crowns
The best Inner Ability for every class is Boss Damage %, Attack Speed +1, or Passive Skills +1 for your prime line.
 thedigitalcrowns.com
- All 3 Pet slots are automatically unlocked in Eluna, the trainers command quest is no longer necessary.
- Upon reaching level 200, open your white light bulb and accept the 5th job advancement quest. (The quest will be skipped.)

- Click the light bulb a second time and complete the second quest for your 5th job advancement.
- Click the light bulb a third time for the quest "A greater power" which will reward you with a false Arcane Symbol. (You may convert this into a Vanishing Journey Symbol by talking to Kao in Lake of Oblivion: Nameless Town)
- All V-Matrix slots are automatically unlocked as of New Age
- V-Matrix Points are used to enhance the skill levels beyond their Node caps, this is done by clicking the "Slot Enhancement Button".
- Level 200~220: Acquire 1 Matrix Point per level up.
- Level 221~260: Acquire 2 Matrix Points per level up.
- Level 261 or higher: No Matrix Points acquired.
- Nodestones are acquired via farming/killing monsters in any Arcane River/Grandis region. (They cost 300,000 meso each in the auction house at the time of this guide)
- You can open up to 600 Nodestones at a time.
- You obtain Skill and Boost Nodes by opening nodestones.
- Skill Nodes have a maximum level of 25 (Boostable by 5 via the V Matrix Enhancement)
- Boost Nodes have a maximum level of 25 x 2 (Boostable by 5 x 2 via the V Matrix Enhancement)
- IE: You can have Cleave/Hunting Decree/Reign of destruction and Hunting Decree/Reign of destruction/Cleave equipped at the same time.
- Please be aware that you are unable to have two boost nodes whose first line of boost is identical. In Example, You are unable to have Cleave/Hunting Decree/Reign of Destruction and Cleave/Aether Bloom/Aether Forge equipped at the same time.
- You can disassemble up to 9999 Nodestones at a time.
- Nodestone points are obtained by disassembling Nodestones.
- Take note that the below boost nodes guide has the flexibility of changing the order of the skills presented in the guide.
- In example, while the guide states the perfect boost node for adele is Cleave/Hunting Decree/Reign of destruction, it can also be Hunting Decree/Cleave/Reign of destruction.
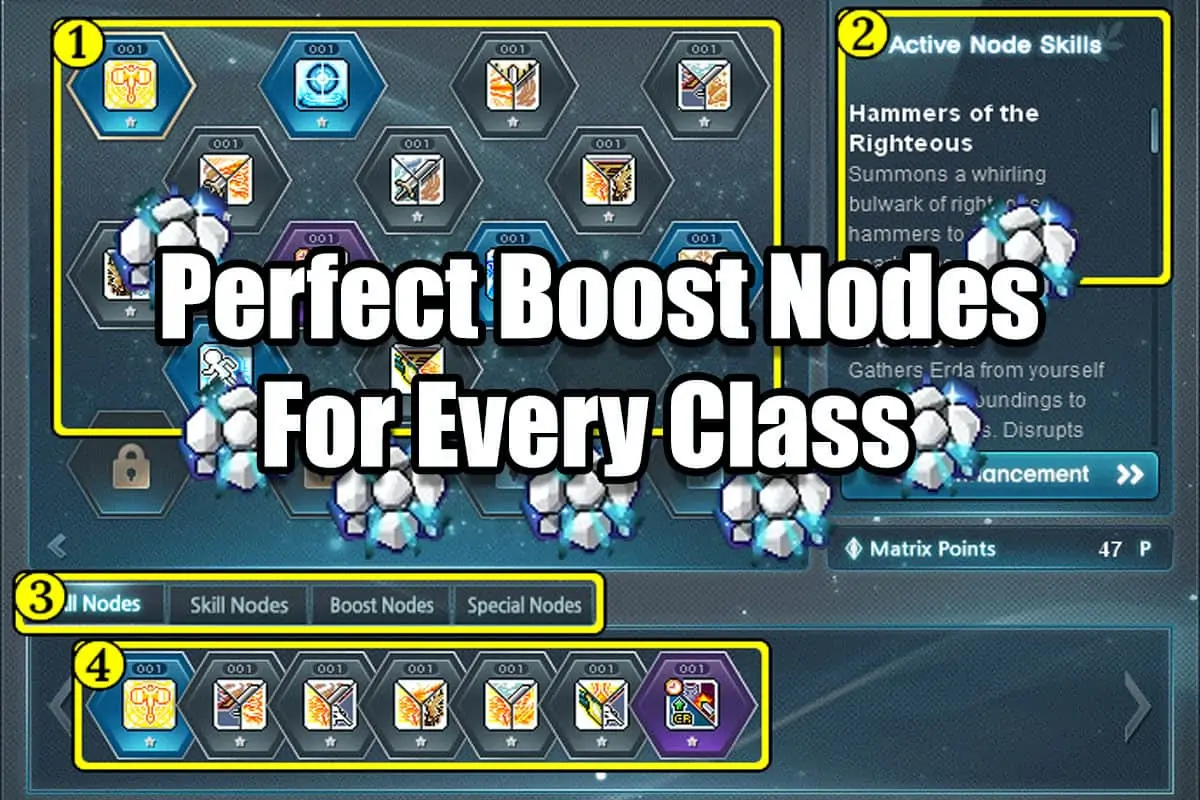
Perfect Boost Nodes For Every Class - MapleStory - The Digital Crowns
This guide will tell you all the skills you need to boost in order to become really strong for that character.
thedigitalcrowns.com
- The 6th Job Advancement is available to level 260 players after acquiring the Cernium Symbol.
- Both quests can be found on the white light bulb at the left of the screen.
- Sol Erda (Automatically created when 1,000 energy is gathered) may be converted into 10 Sol Erda Fragments (Eluna Feature)


- Please refer to Section 2.5 Class Discords to find out more info about your ideal Hexa Matrix and Hexa Stat Progression
- The initial unlock of each Hexa Skill costs more than the initial levels
- The initial unlock of the Hexa Stat costs more than the initial levels
- Placing a Hexa Stat as the Main Stat roughly doubles its numerical value, but gives it a lower probability of being upgraded each level.
- Placing a Hexa Stat as the Secondary Stat increases the probability of it being upgraded each level.


- YouTube
Enjoy the videos and music that you love, upload original content and share it all with friends, family and the world on YouTube.
 www.youtube.com
- The following bosses are those we judged to be beneficial for players/are not simple one hit kills for new players.
- The levels you see in the spoilers are the levels required to gain access to the bosses. They are not necessarily the ideal levels to do the highest amount of damage to the boss.
Hp:
Easy: 400,000,000
Normal: 6,000,000,000
Hard: 120,000,000,000
Pattern guide:
Easy: 400,000,000
Normal: 6,000,000,000
Hard: 120,000,000,000
Pattern guide:
Hp:
Normal: 315,000,000
Chaos: 140,000,000,000
Pattern guide:
Normal: 315,000,000
Chaos: 140,000,000,000
Pattern guide:
Hp:
Normal: 550,000,000
Chaos: 200,000,000,000
Pattern guide:
Normal: 550,000,000
Chaos: 200,000,000,000
Pattern guide:
Bugged boss. You can’t remove hat by any means.
Hp:
Normal: 315,000,000
Chaos: 80,000,000,000
Pattern guide:
Hp:
Normal: 315,000,000
Chaos: 80,000,000,000
Pattern guide:
HP:
Easy P1: 300,000,000
Easy P2: 100,000,000
Normal P1: 12,600,000,000
Normal P2: 4,200,000,000
Chaos P1: 378,000,000,000
Chaos P2: 126,000,000,000
Pattern guide:
Easy P1: 300,000,000
Easy P2: 100,000,000
Normal P1: 12,600,000,000
Normal P2: 4,200,000,000
Chaos P1: 378,000,000,000
Chaos P2: 126,000,000,000
Pattern guide:
HP:
Normal P1: 400,000,000,000
Normal P2: 400,000,000,000
Normal P3:710,000,000,000
Hard P1: 1,700,000,000,000
Hard P2: 7,000,000,000,000
Hard P3: 24,500,000,000,000
Pattern guide:
Normal P1: 400,000,000,000
Normal P2: 400,000,000,000
Normal P3:710,000,000,000
Hard P1: 1,700,000,000,000
Hard P2: 7,000,000,000,000
Hard P3: 24,500,000,000,000
Pattern guide:
HP:
Normal P1: 840,000,000,000
Normal P2: 360,000,000,000
Hard P1: 25,200,000,000,000
Hard P2: 10,800,000,000,000
Pattern guide:
Normal P1: 840,000,000,000
Normal P2: 360,000,000,000
Hard P1: 25,200,000,000,000
Hard P2: 10,800,000,000,000
Pattern guide:
HP:
Easy P1: 6,000,000,000,000
Easy P2: 6,000,000,000,000
Normal P1: 12,000,000,000,000
Normal P2: 12,000,000,000,000
Hard P1: 50,800,000,000,000
Hard P2: 54,000,000,000,000
Hard P3: 12,800,000,000,000
AF damage requirement:
80% - 252
100% - 360
110% - 396
130% - 468
150% - 540
Pattern guide:
Easy P1: 6,000,000,000,000
Easy P2: 6,000,000,000,000
Normal P1: 12,000,000,000,000
Normal P2: 12,000,000,000,000
Hard P1: 50,800,000,000,000
Hard P2: 54,000,000,000,000
Hard P3: 12,800,000,000,000
AF damage requirement:
80% - 252
100% - 360
110% - 396
130% - 468
150% - 540
Pattern guide:
HP:
Easy P1: 5,600,000,000,000 (total 2 dimensions combined)
Easy P2: 4,200,000,000,000
Easy P3: 7,000,000,000,000
Normal P1: 8,400,000,000,000 (total 2 dimensions combined)
Normal P2: 6,300,000,000,000
Normal P3:10,500,000,000,000
Hard P1: 42,000,000,000,000 (total 2 dimensions combined)
Hard P2: 31,500,000,000,000
Hard P3: 52,500,000,000,000
AF damage requirement:
80% - 532
100% - 760
110% - 836
130% - 988
150% - 1140
Pattern guide:
 youtu.be
Easy P1: 5,600,000,000,000 (total 2 dimensions combined)
Easy P2: 4,200,000,000,000
Easy P3: 7,000,000,000,000
Normal P1: 8,400,000,000,000 (total 2 dimensions combined)
Normal P2: 6,300,000,000,000
Normal P3:10,500,000,000,000
Hard P1: 42,000,000,000,000 (total 2 dimensions combined)
Hard P2: 31,500,000,000,000
Hard P3: 52,500,000,000,000
AF damage requirement:
80% - 532
100% - 760
110% - 836
130% - 988
150% - 1140
Pattern guide:
- YouTube
Enjoy the videos and music that you love, upload original content and share it all with friends, family and the world on YouTube.
youtu.be
HP:
Normal: 5,000,000,000,000
Chaos: 90,000,000,000,000
Pattern guide:
www.youtube.com
Normal: 5,000,000,000,000
Chaos: 90,000,000,000,000
Pattern guide:
- YouTube
Enjoy the videos and music that you love, upload original content and share it all with friends, family and the world on YouTube.
www.youtube.com
HP:
Normal: 26,000,000,000,000
Chaos: 126,000,000,000,000
AF damage requirement:
80% - 511
100% - 730
110% - 803
130% - 949
150% - 1095
Pattern guide:
youtu.be
Normal: 26,000,000,000,000
Chaos: 126,000,000,000,000
AF damage requirement:
80% - 511
100% - 730
110% - 803
130% - 949
150% - 1095
Pattern guide:
- YouTube
Enjoy the videos and music that you love, upload original content and share it all with friends, family and the world on YouTube.
youtu.be
HP:
Normal: 26,000,000,000,000
Chaos: 160,000,000,000,000
AF damage requirement:
80% - 595
100% - 850
110% - 935
130% - 1105
150% - 1275
Pattern guide:
youtu.be
Normal: 26,000,000,000,000
Chaos: 160,000,000,000,000
AF damage requirement:
80% - 595
100% - 850
110% - 935
130% - 1105
150% - 1275
Pattern guide:
- YouTube
Enjoy the videos and music that you love, upload original content and share it all with friends, family and the world on YouTube.
youtu.be
HP:
Normal: 88,000,000,000,000
Hard: 176,000,000,000,000
AF damage requirement:
80% - 630
100% - 900
110% - 990
130% - 1170
150% - 1350
Pattern guide:
youtu.be
Normal: 88,000,000,000,000
Hard: 176,000,000,000,000
AF damage requirement:
80% - 630
100% - 900
110% - 990
130% - 1170
150% - 1350
Pattern guide:
- YouTube
Enjoy the videos and music that you love, upload original content and share it all with friends, family and the world on YouTube.
youtu.be
HP:
Hard P1: 63,000,000,000,000 + 63,000,000,000,000 (+750,000,000,000 per White HP Shield)
Aeonian Rise and Tanadian Ruin both share an HP bar and damage taken.
Hard P2: 115,500,000,000,000 (+2,310,000,000,000 per White HP Shield)
Hard P3: 157,500,000,000,000 (+3,500,000,000,000 per White HP Shield)
Hard P4: 135,000,000,000,000 (+3,300,000,000,000 per White HP Shield)
Challenge P1: 126,000,000,000,000 + (1,500,000,000,000 per White HP Shield)
Aeonian Rise and Tanadian Ruin both share an HP bar and damage taken.
Challenge P2: 336,000,000,000,000 + (4,620,000,000,000 per White HP Shield)
Challenge P3: 315,000,000,000,000 +(7,000,000,000,000 per White HP Shield)
Challenge P4: 270,000,000,000,000 +(6,600,000,000,000 per White HP Shield)
Extreme P1: 1,180,000,000,000,000 (+ 42,000,000,000,000 per White HP Shield)
Aeonian Rise and Tanadian Ruin both share an HP bar and damage taken.
Extreme P2: 1,144,000,000,000,000 ( + 44,000,000,000,000 per White HP Shield)
Extreme P3: 1,285,000,000,000,000 ( + 60,000,000,000,000 per White HP Shield)
Extreme P4: 1,185,000,000,000,000 (+ 56,000,000,000,000 per White HP Shield)
Extreme Black Mage forces you to switch between destruction and creation every 30 seconds.
AF damage requirement:
80% - 924
100% - 1320
110% - 1452
130% - 1716
150% - 1980
Pattern guide:
docs.google.com
 youtu.be
Hard P1: 63,000,000,000,000 + 63,000,000,000,000 (+750,000,000,000 per White HP Shield)
Aeonian Rise and Tanadian Ruin both share an HP bar and damage taken.
Hard P2: 115,500,000,000,000 (+2,310,000,000,000 per White HP Shield)
Hard P3: 157,500,000,000,000 (+3,500,000,000,000 per White HP Shield)
Hard P4: 135,000,000,000,000 (+3,300,000,000,000 per White HP Shield)
Challenge P1: 126,000,000,000,000 + (1,500,000,000,000 per White HP Shield)
Aeonian Rise and Tanadian Ruin both share an HP bar and damage taken.
Challenge P2: 336,000,000,000,000 + (4,620,000,000,000 per White HP Shield)
Challenge P3: 315,000,000,000,000 +(7,000,000,000,000 per White HP Shield)
Challenge P4: 270,000,000,000,000 +(6,600,000,000,000 per White HP Shield)
Extreme P1: 1,180,000,000,000,000 (+ 42,000,000,000,000 per White HP Shield)
Aeonian Rise and Tanadian Ruin both share an HP bar and damage taken.
Extreme P2: 1,144,000,000,000,000 ( + 44,000,000,000,000 per White HP Shield)
Extreme P3: 1,285,000,000,000,000 ( + 60,000,000,000,000 per White HP Shield)
Extreme P4: 1,185,000,000,000,000 (+ 56,000,000,000,000 per White HP Shield)
Extreme Black Mage forces you to switch between destruction and creation every 30 seconds.
AF damage requirement:
80% - 924
100% - 1320
110% - 1452
130% - 1716
150% - 1980
Pattern guide:
Black Mage Guide - By Cruel, Bane & Pinkberry
Note: All damage values are exclusive of Black Curse's +15%HP damage
docs.google.com
- YouTube
Enjoy the videos and music that you love, upload original content and share it all with friends, family and the world on YouTube.
youtu.be
- Take note that Normal Seren is a level 270 boss while Hard Seren and Up is 275.
Normal P1: 52,500,000,000,000
Normal P2: 155,500,000,000,000
Hard P1: 126,000,000,000,000
Hard P2: 357,500,000,000,000
Challenge P1: 352,000,000,000,000
Challenge P2: 715,000,000,000,000
Extreme P1: That's a secret for now!
Extreme P2: That's a secret for now!
SAC dmg(phase2)
80% - 180
90% - 190
100% - 200
105% - 210
110% - 220
115% - 230
120% - 240
125% - 250
Pattern guide:
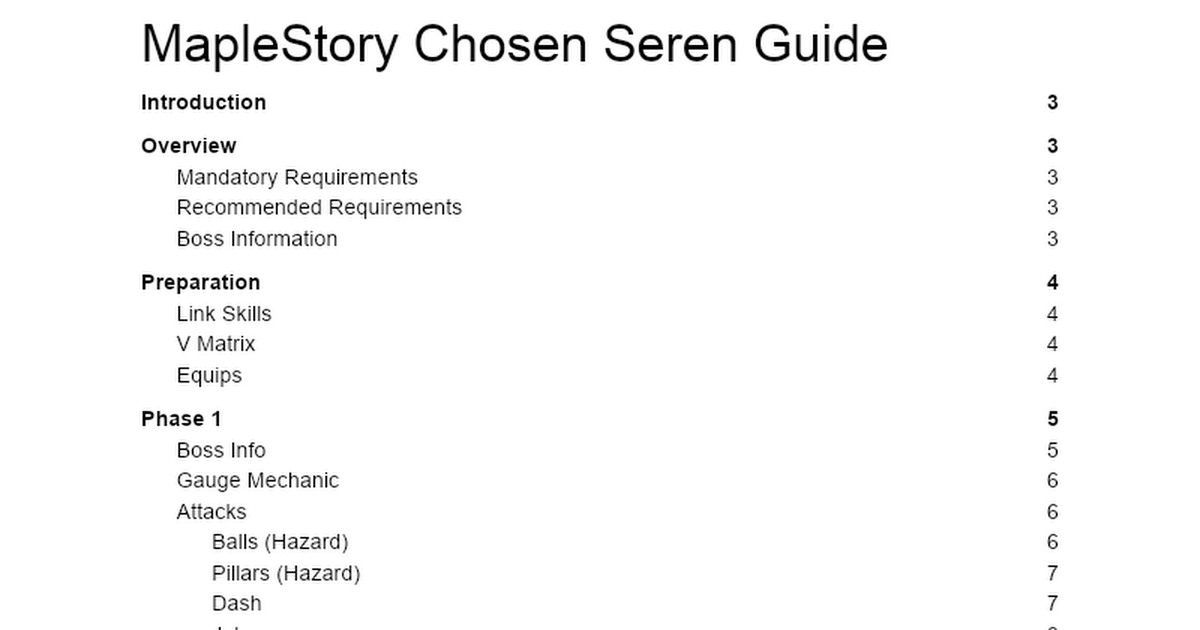
MapleStory Chosen Seren Guide
MapleStory Chosen Seren Guide Introduction 3 Overview 3 Mandatory Requirements 3 Recommended Requirements 3 Boss Information 3 Preparation 4 Link Skills 4 V Matrix 4 Equips 4 Phase 1 5 Boss Info 5 Gauge Mechanic 6 Attacks 6 Balls (Hazard) 6 Pillars (Hazard) 7 Dash 7 Jab 8 Aura 8 Rays 9 Strategy ...
docs.google.com
- YouTube
Enjoy the videos and music that you love, upload original content and share it all with friends, family and the world on YouTube.
youtu.be
HP:
Easy P1: 94,500,000,000,000
Easy P2: 262,500,000,000,000
Rewards 1 Fragment Compared to GMS/KMS with is 0.5
Normal P1: 336,000,000,000,000
Normal P2: 720,000,000,000,000
Rewards 2 Fragments
Challenge P1: 672,000,000,000,000
Challenge P2: 1,440,000,000,000,000
Rewards 2 Fragments + 4(For the first time you clear challenge)
Chaos P1: 1,200,000,000,000,000
Chaos P2: 4,800,000,000,000,000
Rewards 4 Fragments
Extreme P1: 6,720,000,000,000,000
Extreme P2: 24,000,000,000,000,000
Rewards 5 Fragments
SAC dmg(phase2)
80% - 280
90% - 290
100% - 300
105% - 310
110% - 320
115% - 330
120% - 340
125% - 350
Pattern guide:
 docs.google.com
www.youtube.com
docs.google.com
www.youtube.com
Easy P1: 94,500,000,000,000
Easy P2: 262,500,000,000,000
Rewards 1 Fragment Compared to GMS/KMS with is 0.5
Normal P1: 336,000,000,000,000
Normal P2: 720,000,000,000,000
Rewards 2 Fragments
Challenge P1: 672,000,000,000,000
Challenge P2: 1,440,000,000,000,000
Rewards 2 Fragments + 4(For the first time you clear challenge)
Chaos P1: 1,200,000,000,000,000
Chaos P2: 4,800,000,000,000,000
Rewards 4 Fragments
Extreme P1: 6,720,000,000,000,000
Extreme P2: 24,000,000,000,000,000
Rewards 5 Fragments
SAC dmg(phase2)
80% - 280
90% - 290
100% - 300
105% - 310
110% - 320
115% - 330
120% - 340
125% - 350
Pattern guide:
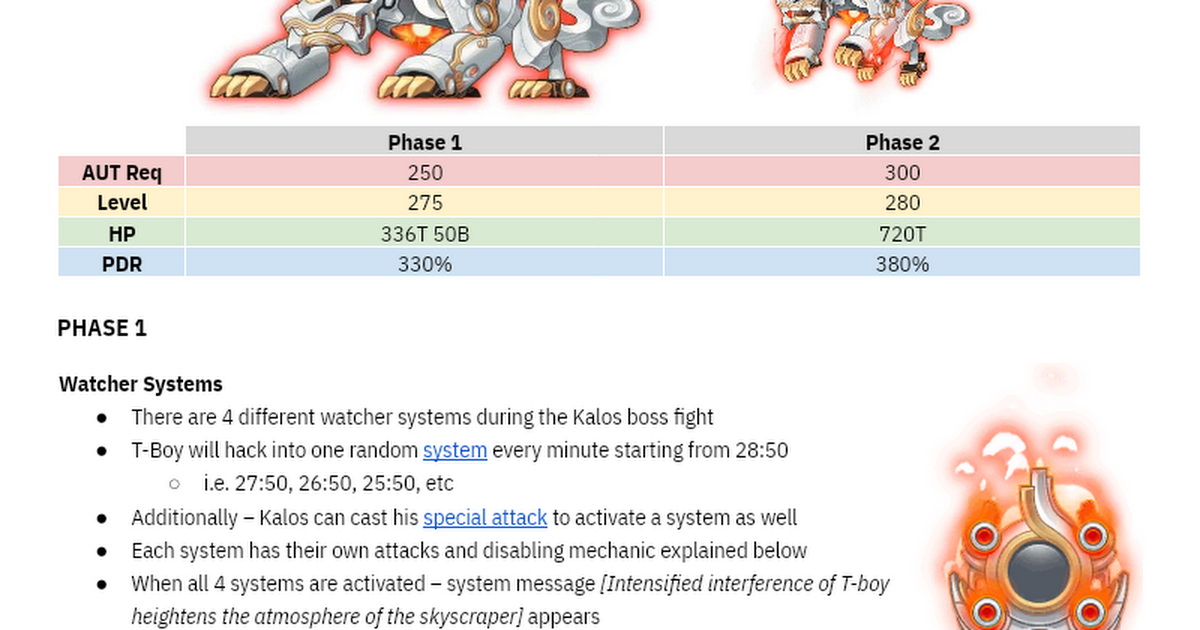
Kalos
BOSS INFO Phase 1 Phase 2 AUT Req 250 300 Level 275 280 HP 336T 50B 720T PDR 330% 380% PHASE 1 Watcher Systems There are 4 different watcher systems during the Kalos boss fight T-Boy will hack into one random system every minute starting from 28:50 i.e. 27:50,...
docs.google.com
- YouTube
Enjoy the videos and music that you love, upload original content and share it all with friends, family and the world on YouTube.
www.youtube.com
SAC dmg(phase2)
80% - 280
90% - 290
100% - 300
105% - 310
110% - 320
115% - 330
120% - 340
125% - 350
Pattern guide:
 docs.google.com
youtu.be
docs.google.com
youtu.be
80% - 280
90% - 290
100% - 300
105% - 310
110% - 320
115% - 330
120% - 340
125% - 350
Pattern guide:
Kaling Guide
Kaling (Normal) Guide [Compilation of all data I can find] Last Updated: 08/11/2023 By. exdrew (>^_^)> PERMA work in progress <(^_^<) DM on disc if you have questions for want to help fill out more data: drewowo TY to LucyPerin for assistance with data mining, collection, etc! Note: A lot of ...
docs.google.com
- YouTube
Enjoy the videos and music that you love, upload original content and share it all with friends, family and the world on YouTube.
youtu.be
Useful bossing buffs & how to obtain them
- 100% Drop Rate from Either a Epic/Unique Familiar with the Large Item Drop Rate Buff or a 2x Drop Rate Coupon (100%) from the Vote Point Shop (These two buffs do not stack)
- 50% Drop Rate Coupons from the legion merchant
- 20% Drop Rate from Wealth Acquisition Potions
- 10-20% Drop Rate from Inner Ability
- 200% Drop Rate from 10 lines of Item Drop Rate on Legendary Rings/Pendants/Face Accessory/Eye Accessory/Earrings
- Variable Drop Rate from Decent Holy Symbol/Holy Symbol
- Monster park Extreme Potions
- +30 (m)att/ +1 att speed & breaks cap for 30 minutes - Monster park
- Legion
- +(m)att +30 - Legion merchant
- Onyx apple
- +100 (m)att for 10 minutes - (dungeon reward)
- Red/blue star pot
- +20% BD / +20% IED for 2 hours - Boss drops
- Guild skills
- +30% BD, +30% IED, +30% Damage, +30% Critical damage for 30 minutes - Guild
- Blessing of guild
- +30 (m)att for 30 minutes - "Deia's G-Potion" quest in lightbulb, need to be in a guild
- Weather Buff
- +30 (m)att for 15 minutes - Cash shop
- MVP
- +30 (m)att for 30 minutes - MVP rewards
- Chair fame
- +50 (m)att for 30 minutes - Fame a person sitting on 275 reward chair
- Pno hidden buff
- +40 (m)att for 30 minutes - Stand top left platform in pno boss room to receive the buff. You can also get the buff in practice mode. (DOES NOT STACK WITH WEATHER BUFF)
- Video: https://www.youtube.com/watch?v=czBuOwbJ7Is
- Weapon Tempering Buff
- 5% Critical damage for 30 Minutes/40 Minutes Cooldown - Meister Smithing (Professions)
- Obtaining Meso and Drop Gear is essential for progression as mesos are the sole currency for starforcing and cubes, while Nodestones and Sol Erda Energy/Fragments are essential for 5th and 6th job progression.
- It is suggested to use the various sources of Legendary Potential scrolls available for your initial legendary accessories as a new player.
- 2x Legendary Potential Scroll 100% from the Boss points reward shop (500 points each with a Weekly reset)
- 1x Legendary Potential Scroll 100% from the Party Quest points reward shop (6000 points each with a Weekly reset)
- 2x Legendary Event Ring Potential Scrolls 100% from the Minigame Shop (1000 Points each with a variable Reset - When bot desires)
- These scrolls are only usable on Event Rings from the Minigame Shop/Login Rewards/Hyper Burning which have stats equivalent to 18 star equipment.
- Phantom Legion Block
- 1/2/3/4/5% at Levels 60, 100, 140, 200, 250
- Inner Ability
- 3-5% at Rare, 8-10% at Epic, 13-15% at Unique, 18-20%
- Wealth Acquisition Potion (Obtained from Daily Dungeon/Crafting)
- 20% Increased Meso Obtained and Item Drop Rate for 2 Hours
- Legion Wealth Coupon (Legion Shop)
- 50% increased meso obtained for 10-30 Minutes
- Legendary Accessories with Meso Obtained Potentials
- 20% * 5 Lines, for a maximum available total of 100% from Potentials
- Shadower class specific skills
- 20%
- Gear progression in Eluna is similar to GMS with some exceptions.
- Gollux is removed
- This thus leads to players using the Golden Clover Belt/12 Star Tyrant Belts (Easily Obtainable during 5/10/15 Starforce Events) as well as utilizing a combination of Dominator/Mechanator Pendants in the early game.
- Commerci is removed
- The twilight Mark + Black Bean Mark is what most players will be using for Face/Eye accessories until they can afford Pitch Bossed Items.
- Transfer hammering from level 140 items to 150 and above is disabled.
- The implications of this are that you are unable to transfer hammer to items such as source of suffering (In part due to the removal of Superior Gollux Pendants).
- Starforce all equipment to 10-12* (If Possible)
- Cube all equipment to Epic with 6% stat
- Consider using Epic potential scrolls for this from Elite Boss Reward Chests
- Legendary potential your Weapon, Secondary and Emblem
- Take note that you should likely only Legendary Potential an Absolab or Arcane Umbra Weapon.
- As of the making of this guide, Arcane Umbra Weapon Boxes cost roughly 2.4Bil or 1K DP while Absolab Weapon Boxes cost roughly 200M or ~100Dp.
- Consider purchasing a Princess No Secondary for roughly ~100M from players instead of your base secondary
- Starforce all equipment to 15-17*
- Cube all gear to Unique 9+% stat
- Black cubes have higher tier up rates than red cubes and are worth the money
- Cube the rest of your equipment to legendary with 2L stat%
- Starforce the rest of your equipment 17*+
- Cube your WSE Bpot to Legendary and try to get 1L of M(Att)
- Cube 27+% stat main potentials
- Starforce all equipment to 20-22 while you work on Bpots during cube sales
- Hat: Pensalir > Japanese/Empress Equipment > CRA > Eternal
- Chest: Pensalir > Japanese/Empress Equipment > CRA > Eternal
- Pants: Pensalir > Japanese/Empress Equipment > CRA > Eternal
- Boots: Pensalir > Japanese/Empress Equipment > Absolab > Arcane Umbra
- Gloves: Pensalir > Japanese/Empress Equipment > Absolab > Arcane Umbra
- Cape: Pensalir > Japanese/Empress Equipment > Absolab > Arcane Umbra
- Shoulder: Royal Black Metal Shoulder > Absolab > Arcane Umbra > Eternal
- Belt: Golden Clover Belt > Tyrant Belt > Dreamy Belt
- Face Accessory: Condensed Power Crystal > Meister Symbol > Twilight Mark > Berserked
- Eye Accessory: Aquatic Eye Accessory > Black Bean Mark > Magic Eye Patch
- Earrings: Dea Sidus Earring > Meister Earring > Estella Earrings > Commanding Force Earring
- Pendants: Mechanator + Dominator Pendant > Daybreak Pendant + Dominator Pendant > Daybreak Pendant + Source of Suffering
- Rings: Silver Blossom Ring/Royal Iffah Ring > Event Rings > Meister Ring + Kanna's Treasure + Dawn Guardian Angel Ring > Oz Rings + Endless Terror
- Weapon: Pensalir > Japanese/Empress Equipment > Cra > Absolab > Arcane Umbra > Genesis Weapon
- Secondary: Vendor Weapon > Princess No Secondary
- Emblem: Default Emblem > Mitra's Rage
- Pocket: Pink Holy Cup > Cursed Spellbook
- Badge: Crystal Ventus Badge > Genesis Badge
- Medal: Vanquisher of Nightmares > Lab Server Pioneer > 7 Day Monster Parker

Familiars provide a massive boost to ingame damage that is too large to ignore for bossing and mobbing. (Elunabot hates them)
- You may rank up your familiars by initially fusing identical familiar cards into them.
- Upon reaching the required number of fused materials and maxing the familiar level (Usually 1-2 minutes of farming with it summoned), you may attempt a "Rank Up".

- If the rank up fails, you will lose half of the required materials previously fused into the familiar and will have to add more fusion material before re-attempting another Rank Up.
- Upon reaching the Unique Rank, the familiar can only be ranked up via Red Familiar Cards which are obtainable via either the Daily Reward Dungeon or the Familiar Shop. (Using the red familiar card is also the only way to reroll the potential)
- To obtain Shop Points, each familiar that is disassembled via extraction rewards 10 points. As such, a red familiar card will cost 50 familiar cards.
- Don't let this dissuade you though! You can obtain familiars with potentials such as 50% Boss damage or 50% Ied from them!
- By Default, each character only has the ability to equip summon one familiar a time.
- By Acquiring familiar badges, players will obtain a 2nd and 3rd familiar summon slot upon completing 1/10 Badges.
- Click on the Icon of Roro on the left of your screen below the maple reward points to speak to him to gain access to familiars and additional slots upon reaching 1 and 10 badges.
- Below are a list of Dailies/Weeklies that you can do.
- Please do pace yourself and feel free to miss them if you want to, make sure to avoid that burnout!
- Daily login
- Kill 300 mobs close to your level range for a daily login reward.
- Vote for 4 VP (8VP during the first 5 days of the month)
- Type @Vote ingame to do this faster
- Daily dungeon
- You may do this 3 times per day
- Tisk food storehouse
- 3 times daily for Mains/Legion/Link Mules
- Daily Arcane river & Grandis quests
- Kill 500 mobs in each region for symbols (Grab the quests from the golden lightbulb)
- Daily Erda’s request for more sol erda and fragments
- Kill 3000 mobs in Grandis(grab from golden lightbulb)
- Sol Erda booster collection
- Once activated via the Cash Tab in your Inventory after acquiring 6th Job, You'll find it from left side of the screen inside the Maple Reward points icon
- Minigames in event hall for 500 minigame points
- Legion coin collection as well as optional daily legion quests for 10+20 Coins
- Daily bosses
- Please skip if troublesome or unrewarding
- Monster park for daily rewards & really good medal once you clear all weekdays 77 times
- I personally skip this as I find it a chore
- Arcane river weeklies
- Weekly Bosses
- Guild culvert & flag race
- Purchasing your weekly stock of items from various Merchants such as the Boss Point Shop/Legion Shop
- Here is a list of useful items compiled into a spreadsheet alongside locations to obtain them, special thanks to Felecia for helping with this.
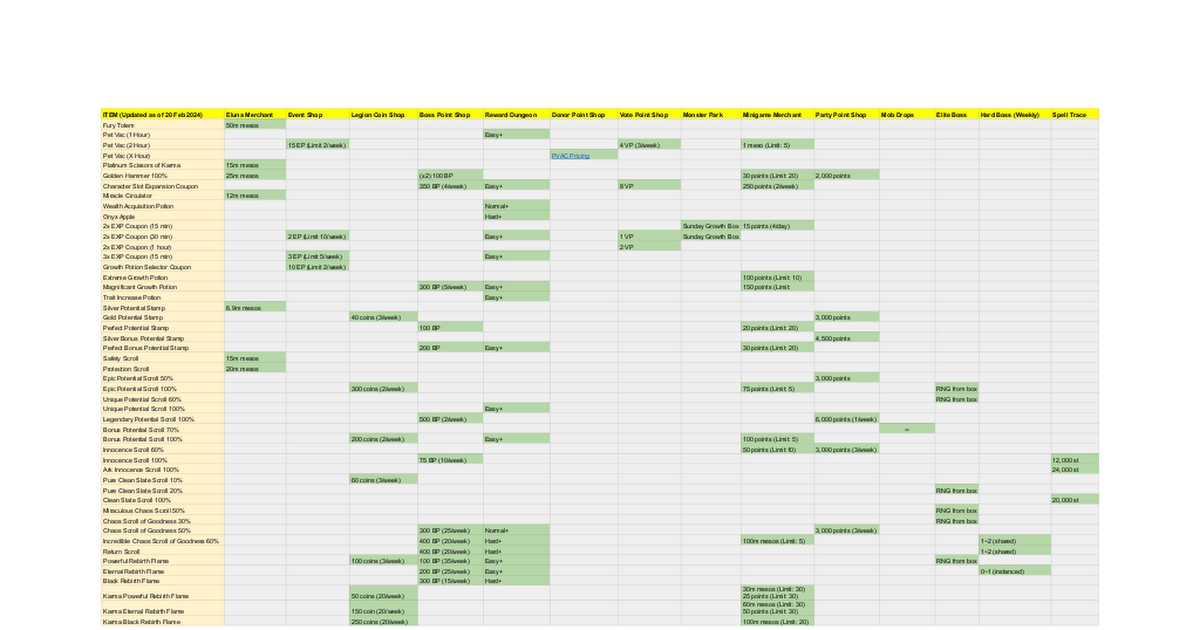
ElunaMS Items Spreadsheet.xlsx
- The following are a summary of key features and events added in the Dreamer Update that players should read up on for their own benefits.
- Sol Janus (Dawn) can be used in conjunction with our custom 2 Erda fountains (Enable this via @Options) for easier farming.
- Killing Bosses Awards you Blue (Night) Fragments which can be used to purchase items in the event shops.
- Capped at 3k Obtainable per week from weekly bosses (You may use multiple characters to cap)
- Being logged into the game earns you Red (Dance) Fragments which can also be used to purchase items in the event shops.
- Legion Artifact and Legion Artifact Booster (DP Shop Booster for NORMAL Quests) has been added to give perpetual buffs to all your characters.
- Speak to Dreaming Lucid and accept the quest on a character that has not yet taken the quest, then use her dialogue option to teleport.

- Speak to the two NPC's and accept their quests to start off the Daily/Weekly Check-ins.

- The Daily Check In Rewards you with 500 Reverie Fragments for simply clicking the Check In Button which you can use to purchase items in the event shop.

- The Weekly Check In can be completed up to 3 Times Per week and rewards you with Check In Rewards as well as Shimmer and Secret Points for powerful buffs.

- You may begin leveling up your Event Buffs after accepting the Daily/Weekly Quests and Completing your First Weekly Check in.
- Shining Points
- Use Shining Points to provide various stats to strengthen your characters up to level 6.
- Secret Points
- Use Secret Points to provide various skills to strengthen your characters up to level 4.


- The Legion Artifact System provides an assortment of permanent buffs across all characters, meant to replace the monster life system.
- You can acquire Artifact EXP and Artifact Points by completing Artifact Missions. Artifact Missions are separated into Normal Missions, Boss Missions, and Special Missions.
- Normal Missions consist of defeating monsters within your level range and logging in weekly. This progress is reset every weekly reset.
- There is a special Legion Artifact Booster available in the DP Shop which doubles the amount of EXP from NORMAL Missions.
- Boss Missions consist of defeating bosses. Only the top 3 reward rank missions within the world are applied. This progress is reset every weekly reset.
- Special Missions consist of missions for various content within MapleStory. They can only be completed once per world. Some are currently not-functioning.
- Normal Missions consist of defeating monsters within your level range and logging in weekly. This progress is reset every weekly reset.
- Utilize either the ingame menu or a keybind to open your legion interface.


- Completing Artifact Missions earns experience which is used to increase your artifact level (rewarding 1 AP per level) as well as Artifact Points.
- Artifact Points are used for changing the stats of an Artifact by right clicking and selecting Convert Stats. It is also used for extending the duration of the legion artifacts and resetting the AP Utilized for leveling up Artifacts.
- You will unlock an additional artifact crystal whenever your legion artifact reaches an interval of 10 (Starting off at level 1 with 3 crystals, with a maximum of 9 at level 60.)
- Each Crystal can have 3 different types of stats from the following list. You can change the combination of stats to any combination of your choice through the [Convert Stats]feature. Each stat can go up to level 10. You are unable to repeat the same stat on the same crystal.
- All Stats (up to 150)
- Max HP/MP (up to 7500)
- Attack/Magic Attack (up to 30)
- Damage (up to 15%)
- Boss Damage (up to 15%)
- Defense Ignore (up to 20%)
- Buff Duration (up to 20%)
- Cooldown Skip Chance (up to 7.5%)
- Meso Acquisition (up to 12%)
- Item Drop Rate (up to 12%)
- Critical Rate (up to 20%)
- Critical Damage (up to 4%)
- Additional Experience Acquisition (up to 12%) and +1 mobs hit for all non-single target skills
- Status Resistance (up to 12)
- Summon Duration (up to 20%)
- Final Attack-Type Skill Damage (up to 30%)
- You can freely alter the types of stats on the crystals as long as you have sufficient Artifact Points.
- Leveling up your Artifact Crystals costs respective 1, 2, 2, 3 AP for each level up to 5 in ascending order.
The following skills count as Final Attack type skills:
- Hero: Final Attack and Advanced Final Attack
- Paladin: Final Attack
- Dark Knight: Final Attack and Revenge of the Evil Eye
- Magician (Fire, Poison): Meteor Shower's Passive Effect
- Magician (Ice, Lightning): Blizzard's Passive Effect and HEXA Blizzard's Passive Effect
- Bowmaster: Final Attack and Advanced Final Attack
- Marksman: Final Attack
- Dual Blade: Blade Clone's Active Effect
- Buccaneer: Nautilus Strike's Passive Effect and HEXA Nautilus Strike's Passive Effect
- Corsair: Majestic Presence
- Cannoneer: Barrel Roulette's Lightning Active Effect
- Aran: Swing Studies I, Swing Studies II, Final Attack, and Advanced Final Attack
- Evan: Dragon Spark and Advanced Dragon Spark
- Mercedes: Final Attack and Advanced Final Attack
- Demon Avenger: Infernal Exceed
- Battle Mage: Dark Genesis's Passive Effect
- Wild Hunter: Summon Jaguar: Another Bite, Final Attack, and Advanced Final Attack
- Blaster: Revolving Cannon Mastery
- Hayato: Akatsuki Trace
- Mihile: Final Attack and Advanced Final Attack
Last edited: